

You want your custom acrylic merchandise to stand out and look professional. Careful artwork preparation helps you avoid costly mistakes and ensures flawless results for acrylic-keychains, charms, magnets, custom acrylic cases, and custom display cases. Many artists and small brands face issues such as using the wrong color, which can create murky streaks, or over-painting, which reduces absorbency.
- Artists, Etsy sellers, independent creators, and small brands benefit from following a checklist for all-products, including bts-collection items.
Yakelike turns your digital designs into vibrant acrylic products and guides you to prepare artwork for printing with confidence.
Key Takeaways
- Choose the right file format for your artwork. Use PDF or vector formats for clear cutting and PNG for designs with transparency.
- Set your artwork dimensions to match the product size. This prevents loss of important details and ensures a professional look.
- Always use high-resolution images of at least 300 DPI. This avoids pixelation and ensures sharp prints on acrylic surfaces.
- Add bleed and safe zones to your designs. This prevents unwanted white edges and keeps important elements visible after cutting.
- Communicate clearly with your manufacturer. Provide detailed instructions and request proofs to ensure your design meets expectations.
Artwork Preparation Basics
Choosing File Formats
You need to select the right file format for your artwork preparation. Acrylic manufacturers accept several file types, but each has unique advantages. Choosing the correct file format ensures your design prints clearly and lasts longer. The table below shows the most frequently accepted file formats for custom acrylic products:
| File Format | Description |
|---|---|
| Can be used for both vector and raster images; ensure the content is vector-based for cutting. | |
| BMP | Suitable for high-resolution images required for detailed engraving. |
| PNG | Supports transparency and high resolution, ideal for detailed designs. |
| JPG/JPEG | Common for photographs and images; ensure high resolution for quality engraving. |
| TIFF | High-quality, uncompressed format, suitable for detailed image engraving. |
When you use the right file format, your acrylic merchandise displays vibrant colors and crisp details. Acrylic prints resist scratches, fading, and moisture, so your products stay beautiful for years. You should avoid low-quality file formats because they can cause pixelation or blurry prints. Always check your manufacturer’s requirements before submitting your artwork preparation files.
Tip: PNG files work well for designs with transparent backgrounds, while PDF and AI files are best for vector graphics and precise cutting.
Setting Dimensions
You must match your artwork size to the product dimensions. Acrylic keychains, standees, charms, magnets, and cases come in different sizes. If your artwork preparation does not fit the product, you risk losing important details or having uneven borders. Use the following guidelines to choose the right size for your acrylic merchandise:
| Size Type | Height | Typical Use |
|---|---|---|
| Small | 5–8 cm | Capsule toys, giveaways |
| Medium | 8–12 cm | Convention merchandise |
| Large | 14–18 cm | Retail display items |
| Extra Large | 20–25 cm | Premium collector products |
You should create your artwork at the exact size needed for your acrylic product. If you plan to make keychains or charms, use small or medium sizes. For standees or display cases, choose large or extra large dimensions. Always check the manufacturer’s template or guidelines before finalizing your artwork preparation.
Using Vector Graphics
Vector graphics play a key role in acrylic manufacturing. You should use vector files for laser engraving and cutting. Vector graphics provide infinite precision and scalability, so your logos and text look sharp at any size. Unlike raster files, vector images do not lose quality when resized. This makes them perfect for acrylic products that require clean edges and accurate shapes.
Vector graphics allow the laser to follow exact paths, which leads to faster and more efficient cutting. You get smooth edges and less material waste. Vector files also help with post-print finishing, such as custom die-cutting and grommet placement. If you use raster files, you risk pixelation and blurry prints, especially on rigid acrylic surfaces.
Note: Create your artwork in vector-based programs like Adobe Illustrator or save as SVG, AI, or PDF. This ensures your acrylic merchandise maintains high quality and clarity.
You should always use vector graphics for artwork preparation when your acrylic product needs precise cutting or engraving. This step helps you achieve professional results and reduces production errors.
Color and Resolution Settings
Selecting Color Models
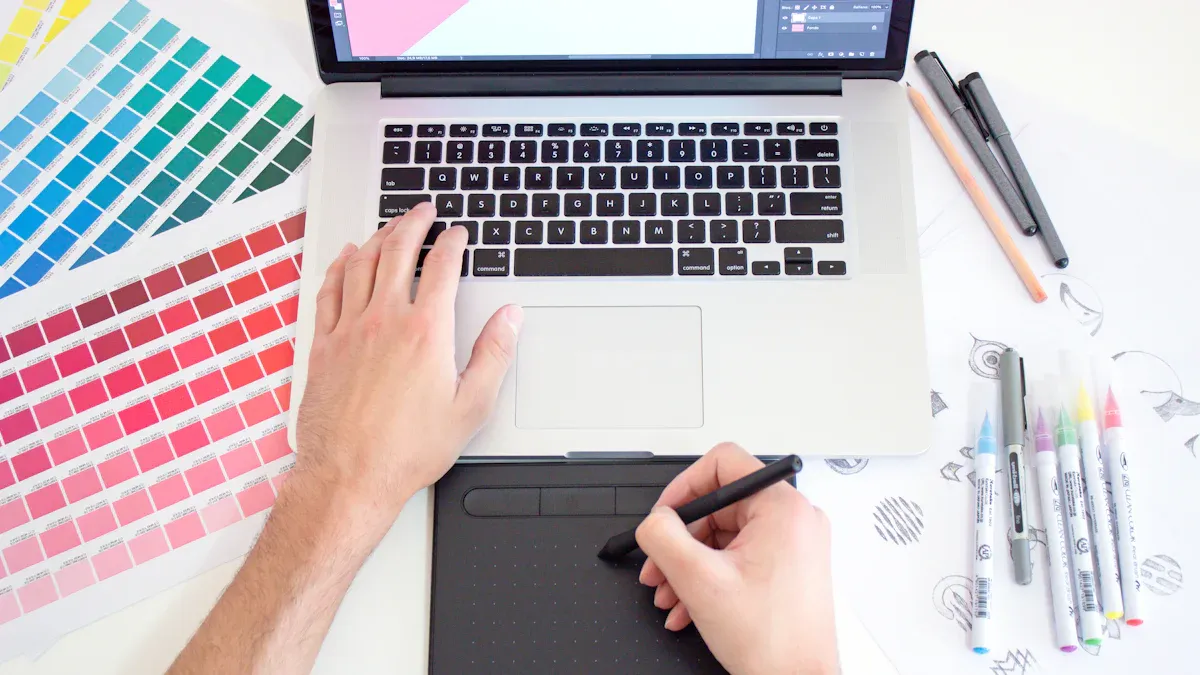
You need to choose the right color model when preparing artwork for acrylic printing. The color model affects how your design appears on the finished product. Most manufacturers recommend using CMYK for acrylic printing. This color model gives you accurate color reproduction on physical media. RGB works well for digital displays, but it can cause color shifts when printed. Designing in CMYK helps you work within the limitations of the printing process.
- CMYK is recommended for acrylic printing due to its accuracy in color reproduction.
- RGB is better for digital displays but may cause color shifts when printed.
- Designing in CMYK helps you avoid unexpected results.
You should always check the manufacturer’s guidelines for the preferred color model. Using the correct color model ensures your acrylic merchandise looks vibrant and professional.
Ensuring High Resolution
You must pay attention to image resolution when preparing artwork for acrylic products. High image resolution gives you sharp and clear prints. Acrylic prints magnify both details and imperfections, so you need to use files with at least 300 DPI (dots per inch) at the desired print size. This step is crucial for keychains, charms, standees, and magnets.
Low image resolution leads to visible pixelation on glossy acrylic surfaces. Images from social media or web searches often lack enough image resolution for quality printing. You should create or use artwork at a minimum of 300 DPI for optimal results. High image resolution helps your acrylic merchandise stand out and look professional.
Tip: Always preview your artwork at full size before submitting it to the manufacturer.
Avoiding Color Shifts
Color shifts can affect the appearance of your acrylic products. You need to understand what causes color shifts and how to prevent them. The table below shows common problems and remedies:
| Problem | Description | Remedy |
|---|---|---|
| Creating color spots | Ink is unevenly distributed on the acrylic. | Use enough ink and properly drag the squeegee across the image. |
| Color bleeding | Pigment is loose, causing ink to spill over surrounding areas. | Make the paint as thick as possible and clean the screen at each registration. |
You can minimize color shifts by using advanced color management systems, making real-time color adjustments, and employing advanced ink technologies. These steps help you achieve consistent and vibrant results for your acrylic merchandise. Choosing the right color model and maintaining high image resolution also reduces color shifts.
Transparent Backgrounds and Cut Lines
Creating Transparent Layers
You need to create transparent layers in your artwork to achieve clean, professional acrylic products. Transparent backgrounds allow your design to stand out without unwanted borders or blocks of color. Follow these steps to prepare effective transparent layers:
- Assess your surface. Use a wash (8 parts water to 2 parts paint) for matte or absorbent surfaces. This lets the color sink in and creates a soft, see-through effect.
- For glossy or non-absorbent surfaces, mix 8 parts acrylic medium with 2 parts paint. This creates a glaze that sits on top of the surface.
- Apply glazes in small areas with a brush. Spread the glaze with a rag for even coverage.
- Choose slow-drying acrylics, such as Golden’s Open Acrylics, for easier blending and glazing.
Tip: Always save your artwork with a transparent background, especially when using PNG or vector files. This prevents unwanted white or colored edges on your final acrylic product.
Adding Bleed and Safe Zones
You should add bleed and safe zones to your artwork to avoid unintentional white edges and ensure important details are not cut off during production. Bleed is extra space around your design that gets trimmed away, while the safe zone keeps key elements away from the edge.
- For small acrylic items like keychains or charms, add a 0.125 inch (3 mm) bleed on all sides.
- For larger products, such as standees or display cases, increase the bleed to 0.25–0.5 inch.
- Keep all text and important details at least 0.125 inch inside the cut line to stay within the safe zone.
Note: Bleed and safe zones help you achieve a polished, professional look and prevent production errors.
Designing Cut Lines
Cut lines define the final shape of your acrylic merchandise. You must design clear and accurate cut lines to ensure your product looks and feels right.
- The quality of your cut edges affects both the appearance and strength of your acrylic items.
- Laser cutting and diamond-cut finishing create different edge effects. Choose the method that matches your vision.
- Adjust cut lines for unique shapes. This allows you to customize keychains, charms, or standees for your brand.
Tip: Use vector paths for cut lines. This gives the manufacturer precise guidance for cutting and reduces the risk of jagged edges.
By preparing transparent layers, adding proper bleed, and designing accurate cut lines, you set the foundation for flawless custom acrylic products.
Print-Ready Artwork Checklist
Before you send your files to the manufacturer, you need to make sure your artwork preparation meets every requirement for custom acrylic products. This checklist helps you prepare artwork for printing and ensures your designs look flawless on acrylic keychains, charms, standees, magnets, and cases.
Reviewing for Errors
You should always review your print-ready artwork before submission. Even small mistakes can lead to costly errors or delays in production. Follow these steps to catch common issues:
- Check that your artwork bleeds into the bleed areas. This prevents unwanted white spaces along the edges of your custom acrylic items.
- Confirm the document dimensions match the final trim size of your product. Double-check the template from your manufacturer.
- Set up a bleed of at least 0.125 inch (3 mm) on all sides. This extra space ensures a clean cut for your acrylic merchandise.
- Make sure your image resolution is set to 300 DPI. This avoids blurry or pixelated prints on acrylic surfaces.
- Inspect all text and lines. Thin lines should be at least 0.25pt thick, and text should be at least 6pt for readability.
- Use 100% K value for black text, QR codes, or barcodes. This step ensures sharp, clear printing on your custom acrylic products.
- Convert all fonts to outlines. This prevents missing font issues when the manufacturer opens your file.
- Ensure all images are embedded, not linked. Linked images may not appear correctly in the final print-ready artwork.
Tip: Zoom in to 100% on your screen to spot any unwanted elements, stray marks, or hidden layers before you finalize your artwork preparation.
Flattening and Saving Files
After you review your design, you need to flatten and save your print-ready artwork in the correct format. This step locks in your design and prevents accidental changes during production.
- Flatten all visible layers in your file. This merges your artwork into a single layer, reducing the risk of missing elements.
- Save your file in the format requested by your acrylic manufacturer. Common formats include PDF, AI, PSD, and PNG. Always check the manufacturer’s guidelines for custom acrylic products.
- Double-check that your file uses the CMYK color mode. This ensures accurate color reproduction when you prepare artwork for printing on acrylic.
- Name your file clearly, including the product type and size. For example: “keychain_2x2in_final.pdf”.
| File Format | Best Use Case |
|---|---|
| Vector artwork, cut lines | |
| AI | Editable vector files |
| PSD | Layered raster artwork |
| PNG | Transparent backgrounds |
Note: Saving your print-ready artwork in the correct format helps your manufacturer process your order quickly and accurately.
Submitting to Manufacturer
Once you have your print-ready artwork, you are ready to submit your files to the acrylic manufacturer. Follow these final steps to ensure a smooth production process:
- Review the manufacturer’s submission guidelines for custom acrylic products. Each company may have specific requirements for file types, naming, and upload methods.
- Attach your print-ready artwork files. Double-check that you included all necessary files, such as cut line layers or special instructions.
- Provide clear instructions for any custom features, such as double-sided printing, glitter effects, or special finishes.
- Request a digital proof or sample if available. This allows you to see how your artwork preparation will look on the finished acrylic product.
- Keep a backup of your final files. Store them in a safe location in case you need to make changes or reorder your custom acrylic merchandise.
Callout: Communicate with your manufacturer if you have any questions about the submission process. Clear communication helps you avoid misunderstandings and ensures your custom acrylic products turn out exactly as you envisioned.
By following this print-ready artwork checklist, you can confidently prepare artwork for printing and achieve professional results for every custom acrylic project.
Communicating with Manufacturers
Clear communication with your acrylic manufacturer ensures your artwork translates into high-quality merchandise. You need to provide detailed instructions, review proofs, and know where to get support. Yakelike, a professional custom acrylic manufacturer, specializes in acrylic keychains, standees, charms, magnets, and other personalized products. Working closely with your manufacturer helps you avoid misunderstandings and achieve the results you want.
Providing Instructions
When you submit your artwork, include all necessary details for production. You should:
- Specify fabrication techniques, such as cutting, drilling, or thermoforming, to match your design vision.
- Share safety precautions, especially if your product will face heat or cleaning chemicals. This helps prevent fire hazards and ensures material compatibility.
- Recommend maintenance practices for cleaning and disinfecting your acrylic items. Proper care keeps your merchandise looking new.
Tip: Attach a clear description or diagram with your artwork file. This helps the manufacturer understand your expectations and reduces the chance of errors.
Requesting Proofs
Requesting a proof is a smart step before full production. You can:
- Review and approve a sample to see how your design appears on acrylic.
- Spot and correct design errors early, such as wrong colors or incorrect measurements.
- Reduce the risk of costly mistakes after manufacturing.
A proof gives you peace of mind and lets you make changes before your order is finalized.
Yakelike Support
Yakelike offers dedicated support throughout the process. You can reach out with questions about file formats, color settings, or special finishes. The team provides guidance on artwork preparation and reviews your files for accuracy. If you need help with cut lines or want advice on product options, Yakelike responds quickly and helps you achieve professional results.
Note: Good communication with your manufacturer leads to flawless custom acrylic products and a smooth production experience.
Common Mistakes to Avoid
When you prepare artwork for custom acrylic products, you need to watch for common mistakes that can affect the final result. Paying attention to these issues helps you save time and money.
Low-Resolution Images
You should always use high-resolution images for your acrylic merchandise. Low-resolution files cause blurry prints and visible pixelation. Acrylic surfaces highlight every detail, so poor quality stands out. Set your artwork to at least 300 DPI at the actual product size. Preview your design at full size before submitting it. If you use images from social media or screenshots, check their resolution. Replace low-quality graphics with original or professionally created artwork.
Tip: High-resolution files ensure your acrylic keychains, charms, and standees look sharp and vibrant.
Missing Bleed or Cut Lines
You must add bleed and cut lines to your artwork. Bleed prevents unwanted white edges after trimming. Cut lines guide the manufacturer in shaping your product. If you skip these steps, you risk losing important parts of your design.
The most common and costliest mistake is creating the file at the final trim size instead of adding bleed area. The printer extends your image to create bleed, often cropping important elements or resulting in white edges after trimming. This leads to reprinting costs and project delays.
Always check the template from your manufacturer. Add at least 0.125 inch (3 mm) bleed for small items. Keep all key details inside the safe zone. Use vector paths for cut lines to ensure precision.
Incorrect File Formats
You need to save your artwork in the correct file format. Manufacturers accept specific formats like PDF, AI, PSD, and PNG. If you submit the wrong format, your design may not print correctly or could delay production. Raster files work for detailed images, but vector files are best for cutting and engraving.
| File Format | Use Case |
|---|---|
| Vector artwork, cut lines | |
| AI | Editable vector files |
| PSD | Layered raster artwork |
| PNG | Transparent backgrounds |
Check the manufacturer’s guidelines before submitting your files. Proper file formats help your acrylic products turn out exactly as you expect.
Custom Acrylic Cases and Product Tips
Keychains and Charms
You want your custom acrylic keychains and charms to look sharp and last long. Start by designing your artwork at the exact size you need. Use vector graphics for clean edges and clear cut lines. Always add a bleed area to prevent white borders after cutting. Choose transparent backgrounds so your custom designs pop on the acrylic surface. When you prepare your files, keep all important details away from the edge. This step protects your artwork during the cutting process.
Store your finished charms and keychains with care. You can use small pouches or divided containers to prevent scratches. Keep your custom acrylic items away from sunlight, heat, and moisture. Wipe them gently with a soft, damp cloth to remove dust and fingerprints.
Standees and Magnets
Custom acrylic standees and magnets need precise artwork and sturdy construction. Set your artwork to the final product size and use high-resolution images. For standees, design a stable base and clear outlines for cutting. Magnets work best with bold colors and simple shapes. Always check the orientation of your artwork before submitting it for production. This step ensures your custom acrylic products display correctly.
You should select custom display cases or storage boxes that fit your collection. This protects your acrylic standees and magnets from damage and keeps them organized.
Special Considerations
When you prepare artwork for custom acrylic cases, pay attention to the product’s shape and function. Design your artwork to fit the case’s dimensions and avoid placing important elements near the edges. Use transparent layers for a clean look. For best results, choose high-grade acrylic materials. Factories that use quality management systems reduce defects and improve durability.
| Production Tip | Detail |
|---|---|
| Material Quality | Use high-grade acrylic for strong, vibrant custom products. |
| Manufacturer Selection | Work with factories that offer samples and specialize in custom designs. |
| Cost vs Quality | Invest in quality to protect your brand reputation. |
After printing, allow enough curing time for the ink to set. This step prevents smudges and keeps your custom acrylic cases looking professional. Always review your manufacturer’s guidelines for the best results.
You want every custom acrylic project to shine. Use this checklist for each custom acrylic order to avoid mistakes and get the best results. Double-check your artwork before you submit it to the acrylic manufacturer. If you have questions or need a file review, reach out to Yakelike or your chosen custom acrylic partner. Careful preparation helps you create custom acrylic merchandise that stands out and impresses your customers.
FAQ
How do you choose the best file format for acrylic products?
You should select a file format that supports transparency and high resolution. PNG works well for designs with clear backgrounds. Vector formats like AI or PDF help with precise cutting and engraving for acrylic merchandise.
What resolution should your artwork have for acrylic printing?
You need to set your artwork to at least 300 DPI. This resolution ensures sharp and clear prints on acrylic surfaces. Low-resolution images can appear blurry or pixelated after production.
Why is adding bleed important for acrylic merchandise?
Adding bleed prevents unwanted white edges after trimming. You should extend your artwork beyond the cut line by at least 0.125 inch. This step helps your acrylic products look polished and professional.
How do you create accurate cut lines for acrylic items?
You should use vector paths to define cut lines. This method gives the manufacturer clear guidance for shaping your acrylic merchandise. Precise cut lines help avoid jagged edges and ensure your product matches your design.
What should you check before submitting artwork to an acrylic manufacturer?
You need to review your artwork for errors, confirm the correct file format, and ensure proper resolution. Always check for transparent backgrounds, bleed, and accurate cut lines. Clear instructions help your acrylic manufacturer produce flawless merchandise.
