
Designing custom acrylic standees is not just about making artwork look good.
It is about making the product stable, attractive, and easy to produce.
Many designs look perfect on screen. However, they may feel unstable or unbalanced in real life.
In this guide, you’ll learn how to design custom acrylic standees that look better, stand better, and sell better.
Step 1: Start With the Right Size
Size affects both appearance and cost.
In most cases, the best-selling range for custom acrylic standees is:
- 4–6 inch for desk display
- 2–3 inch for bundles
- 7–8 inch for premium editions
Smaller sizes reduce shipping cost.
However, larger sizes increase visual impact.
Therefore, choosing the right size depends on your sales goal.
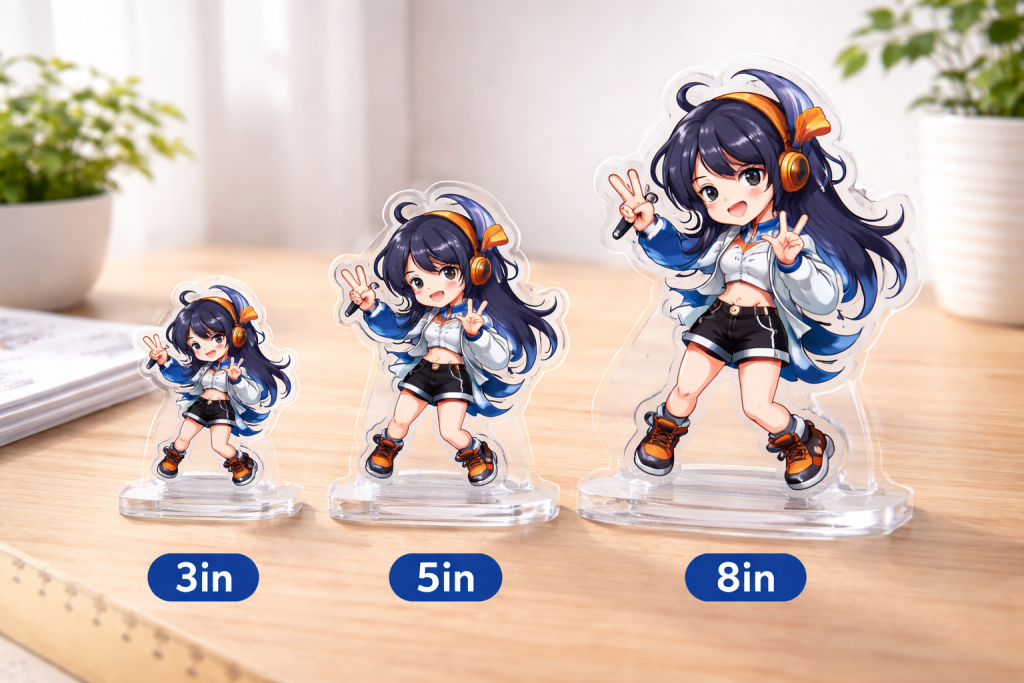
As shown above, different sizes of custom acrylic standees affect both visibility and overall stability.
Step 2: Balance the Artwork Layout
Artwork layout directly affects stability.
For example:
- Wide poses shift weight sideways
- Tall designs increase tipping risk
- Heavy top elements affect balance
Therefore, avoid placing all visual weight at the top.
Instead, keep the center of gravity balanced.
If your artwork is wide, consider a wider base.
If it is tall, consider a thicker base.
For more details, read:
👉 Custom Acrylic Standees Base Guide: Choose the Right Stand for a Stable Display
Step 3: Choose the Right Base Early
Many designers ignore the base.
However, the base determines how stable your custom acrylic standees feel.
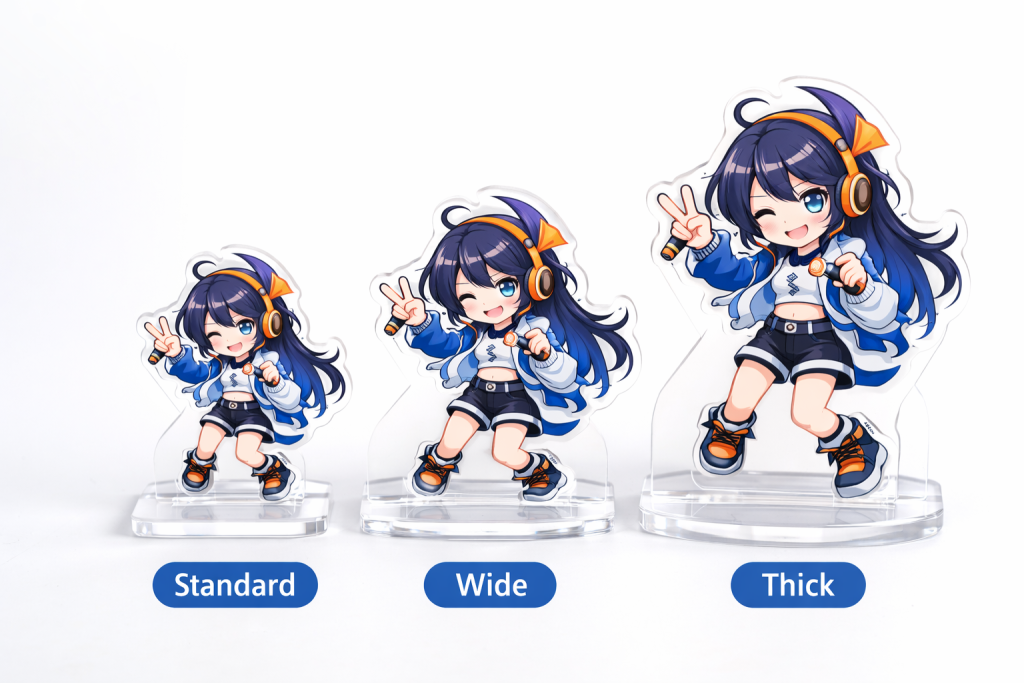
There are three common options:
- Standard rectangle base
- Wide base
- Thick base
In most cases:
Wide artwork → wider base
Tall artwork → thicker base
Choosing the base early prevents redesign later.
The right base improves both stability and perceived quality.
Step 4: Consider Production Limitations
Design is creative.
Production is technical.
For example:
- Extremely thin parts may break
- Sharp corners may chip
- Tiny floating details increase risk
Therefore, always keep production in mind.
In addition, discuss slot thickness and fit tolerance before finalizing the design.
If you’re planning your timeline, read:
👉 When Is the Best Time to Order Custom Acrylic Keychains? A Buyer’s Planning Guide
Step 5: Think About Packaging and Shipping
Design decisions affect logistics.
For instance:
- Larger bases increase packaging size
- Thicker bases increase weight
- Loose fit increases damage risk
As a result, a well-balanced design reduces return complaints.
If you want cost insights, read:
👉 How Much Do Custom Acrylic Keychains Cost? A Practical Pricing Guide
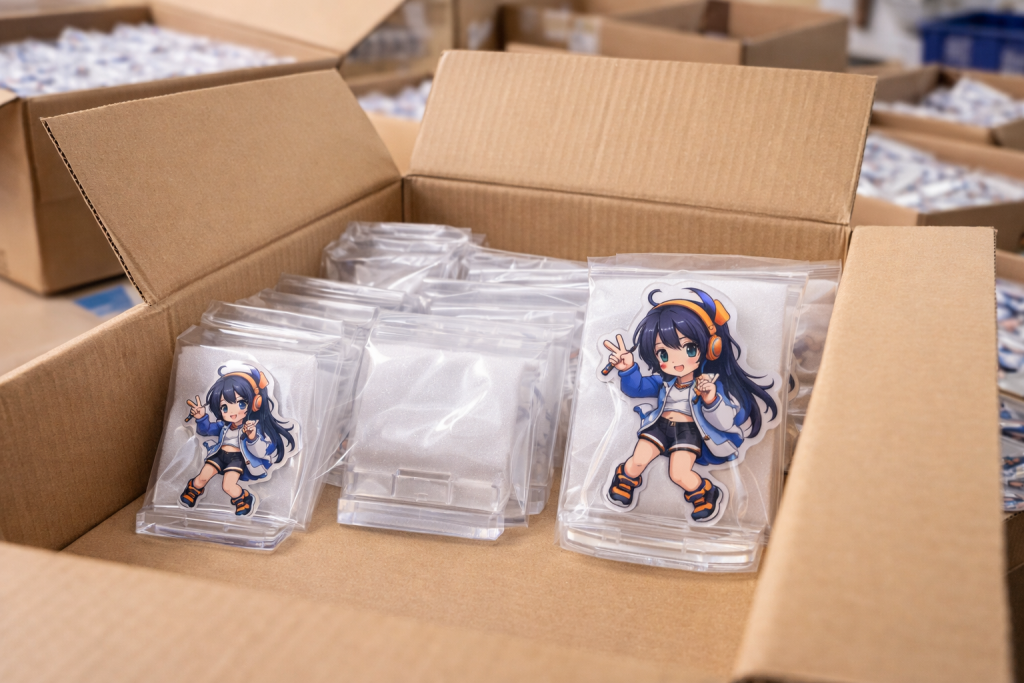
Good packaging starts with smart design decisions.
Step 6: Design for Selling, Not Just Display
Selling versions and display versions are different.
For example:
- Retail counters need higher visibility
- Online stores need photogenic balance
- Event booths need transport-friendly sizes
Therefore, design with your sales channel in mind.
In most cases, 4–6 inch custom acrylic standees offer the best balance of cost, visibility, and stability.
FAQ: Designing Custom Acrylic Standees
What is the best size for custom acrylic standees?
The most popular size is 4–6 inch.
It balances stability, shipping cost, and display impact.
Should I design the base separately?
Yes.
Designing the base early prevents stability issues.
It also avoids costly production revisions.
Can I offer multiple size options?
Absolutely.
Many brands offer:
- Standard version
- Mini bundle version
- Premium large version
This increases average order value.
Final Thoughts
Designing custom acrylic standees that sell requires balance.
Artwork, base selection, size, and packaging must work together.
However, when these elements align, the product feels stable and professional.
If you design with real-world use in mind, your standees will not only look good — they will sell better.